SAME DAY ESTIMATES AVAILABLE

CALL FOR A FREE ESTIMATE

(440) 457-7064

March 24, 2026

How to Pour a Heated Garage Slab (Complete Step-by-Step Guide)

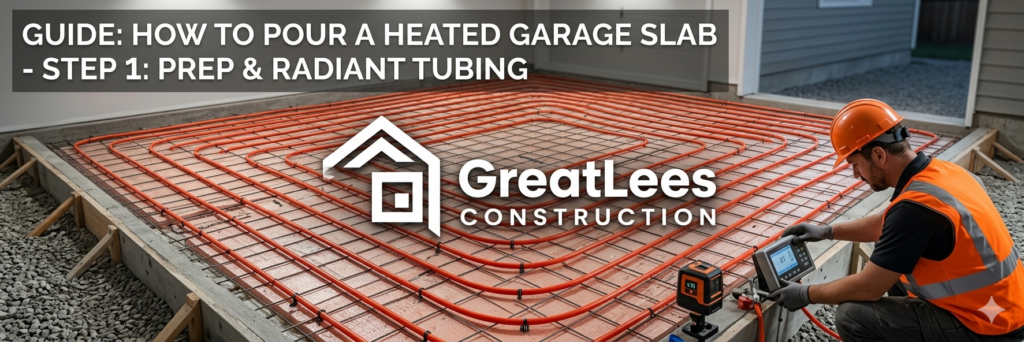
A heated garage slab—also known as a radiant floor heating system—is one of the best upgrades for comfort, durability, and energy efficiency. Instead of heating the air, it warms the concrete floor itself, creating consistent, even heat throughout the space.

This guide walks you through the entire process, from planning and preparation to pouring concrete and starting the system.

What Is a Heated Garage Slab?

A heated garage slab uses radiant floor heating, typically with PEX tubing embedded inside the concrete. Warm water circulates through the tubing, heating the slab and radiating warmth upward.

Key Benefits:

  • Even, consistent heat distribution
  • No cold floors in winter
  • Energy-efficient heating
  • Reduced dust and air movement
  • Ideal for workshops and cold climates

Types of Heated Garage Systems

Hydronic (Water-Based) Systems

  • Uses PEX tubing with hot water
  • Heated by a boiler or water heater
  • Most common and efficient

Electric Radiant Systems

  • Uses electric cables
  • Easier to install but higher operating cost
  • Better for small areas

Recommendation: Hydronic systems are best for garages.

Tools and Materials Needed

Tools:

  • Shovel or excavator
  • Plate compactor
  • Level and laser level
  • Rebar cutter/bender
  • Staple gun (for tubing)
  • Concrete mixer or truck

Materials:

  • Gravel base
  • Vapor barrier (plastic sheeting)
  • Rigid foam insulation
  • PEX tubing
  • Manifold system
  • Rebar or wire mesh
  • Concrete mix

Step 1: Plan the Layout

Planning is critical before any work begins.

Key Decisions:

  • Garage size and slab thickness
  • Tubing layout (spacing and loops)
  • Location of manifold
  • Heating source (boiler or heater)

Tubing Spacing:

  • Standard: 6″ to 12″ apart
  • Closer spacing = more heat

Step 2: Prepare the Ground

A solid base ensures long-term durability.

Steps:

  1. Excavate the area to required depth
  2. Remove organic material and debris
  3. Add a gravel base (4″–6″)
  4. Compact the gravel thoroughly

Important:

Proper compaction prevents future cracking.

Step 3: Install Vapor Barrier

A vapor barrier prevents moisture from rising into the slab.

Installation:

  • Lay plastic sheeting over the gravel
  • Overlap seams by several inches
  • Tape seams securely

Step 4: Add Rigid Foam Insulation

Insulation ensures heat goes upward into the garage, not into the ground.

Types:

  • Extruded polystyrene (XPS)
  • Expanded polystyrene (EPS)

Installation:

  • Place foam boards over vapor barrier
  • Fit tightly with no gaps
  • Add edge insulation around slab perimeter

Step 5: Install Reinforcement (Rebar or Mesh)

Reinforcement strengthens the concrete.

Options:

  • Wire mesh
  • Rebar grid

Installation:

  • Place on chairs or supports
  • Keep it centered within the slab

Step 6: Install PEX Tubing

This is the core of the heating system.

Steps:

  1. Lay out tubing according to your plan
  2. Use a serpentine or spiral pattern
  3. Secure tubing to rebar or mesh using ties or clips
  4. Keep consistent spacing (6″–12″)
  5. Avoid sharp bends

Important Tips:

  • Label each loop
  • Keep loop lengths consistent
  • Do not kink the tubing

Step 7: Connect to Manifold

The manifold distributes water to each loop.

Steps:

  • Run tubing ends to manifold location
  • Connect supply and return lines
  • Ensure all connections are secure

Step 8: Pressure Test the System

Before pouring concrete, test for leaks.

How to Test:

  • Fill tubing with water or air
  • Pressurize system
  • Leave for 24 hours
  • Check for pressure drops

Never skip this step.

Step 9: Pour the Concrete Slab

Now comes the main pour.

Steps:

  1. Keep tubing pressurized during pour
  2. Pour concrete evenly across the surface
  3. Use a screed to level the slab
  4. Smooth with a float or trowel

Slab Thickness:

  • Typically 4″ to 6″

Important:

Avoid stepping directly on tubing.

Step 10: Finish and Cure the Concrete

Proper curing ensures strength and durability.

Steps:

  • Keep surface moist for several days
  • Avoid heavy loads during curing
  • Allow full curing (about 28 days)

Step 11: Connect Heating System

After curing, connect the system to a heat source.

Options:

  • Boiler
  • Water heater
  • Solar system (advanced setup)

Final Steps:

  • Install thermostat
  • Balance the system
  • Start heating gradually

Tubing Layout Patterns Explained

Serpentine Pattern

  • Easier to install
  • Slight temperature variation

Spiral Pattern

  • More even heat distribution
  • Preferred for garages

Common Mistakes to Avoid

Skipping Insulation

Without insulation, heat is lost into the ground.

Poor Tubing Layout

Uneven spacing leads to cold spots.

Not Pressure Testing

Leaks under concrete are very difficult to fix.

Thin Slab

A slab that is too thin may crack or perform poorly.

Rushing the Cure

Improper curing weakens the concrete.

Pro Tips for Best Results

Use Edge Insulation

Prevents heat loss around slab perimeter.

Plan for Future Access

Keep manifold accessible for maintenance.

Label All Loops

Makes troubleshooting easier later.

Work with Professionals if Needed

Especially for boiler setup and system design.

Is a Heated Garage Slab Worth It?

A heated slab is a long-term investment that provides:

  • Superior comfort
  • Lower heating costs over time
  • Increased property value
  • Better usability in cold climates

It’s especially valuable if you spend time working in your garage.

Final Thoughts

Pouring a heated garage slab requires careful planning, proper materials, and precise installation. The process involves preparing a solid base, installing insulation and tubing, and pouring concrete with attention to detail.

When done correctly, it delivers a highly efficient and comfortable heating system that lasts for decades.

This is not just a construction upgrade—it’s a lifestyle improvement that transforms how your garage feels and functions year-round.

Custom Outdoor Buildings in Ohio

At Great Lees Construction, we design and build high-quality outdoor structures for homeowners across Ohio. Whether you need a durable garage, a practical storage shed, or a spacious barn, our team delivers expert craftsmanship and long-lasting materials.

Custom Garages

Looking for strong and reliable garages? We build custom garages in Ohio that provide secure parking, extra storage, and long-term durability for your property.

Learn More

Storage Sheds

Need additional storage space? Our storage sheds in Ohio are perfect for tools, lawn equipment, and backyard organization while enhancing your property’s appearance.

Explore Sheds

Custom Barns

Our team specializes in building custom barns in Ohio designed for farming, livestock, equipment storage, and multi-purpose rural use.

View Barns

Veteran Owned & Operated Since 2017

4.1 Average Rating (31 Reviews)

Headquarters

17601 W 130th St Suite #4

North Royalton, OH 44133

Business Hours

Monday - Friday: 8:00 AM - 5:00PM

Quick Links

Copyright © 2026 Greatlees Construction Inc. - Privacy Policy - Built & Powered by DevQ